
We've all been there — you reach for your favourite hand knit sweater and notice a pulled thread or unsightly snag. Whether it's a pet's claw, a rough table edge, or an accidental hangnail catch, a snag doesn't have to mean disaster. The key is acting quickly before it worsens into a hole.
With over 60 years in the needlework business, Mary Maxim knows a thing or two about caring for handmades. This guide covers two scenarios: fixing a snag where the yarn is still intact, and repairing one where the yarn has broken.
What You'll Need
Gather these tools before you begin:
- Small-diameter crochet hook
- Darning needle (also called a yarn needle)
- Hand-sewing needle and thread (matching colour)
- Leftover yarn from your project (optional, but helpful)
Tip: Always save your leftover yarn and the ball band label when finishing a project. If you ever need to make repairs, you'll have everything you need to match the colour and fibre perfectly.
Part 1: Fixing a Snag (Yarn Still Intact)
If the yarn has been pulled but not broken, you're in luck — this is the easier fix. Follow these steps carefully.
Step 1: Resist the Urge to Cut
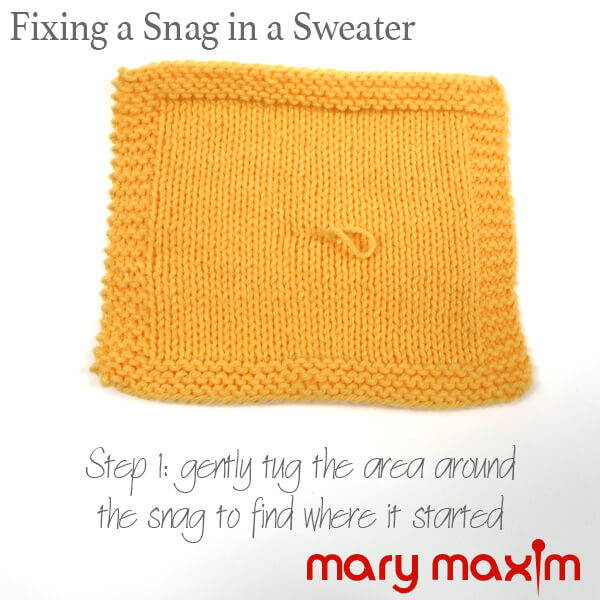
Do not cut the snagged yarn — this is the most important rule. If the garment looks distorted but the strand is unbroken, locate the snagged stitch by gently pulling the fabric around the snag from all sides. This helps you identify exactly where the tension has been disrupted.
Step 2: Redistribute the Tension
Once you've found the pulled stitch, gently tug the stitches above and beside it to begin evening out the tension. Your goal is to coax the stitches back to their original size and shape. Use a yarn needle to grab stitches that are too tight and loosen them gradually — work slowly and methodically.
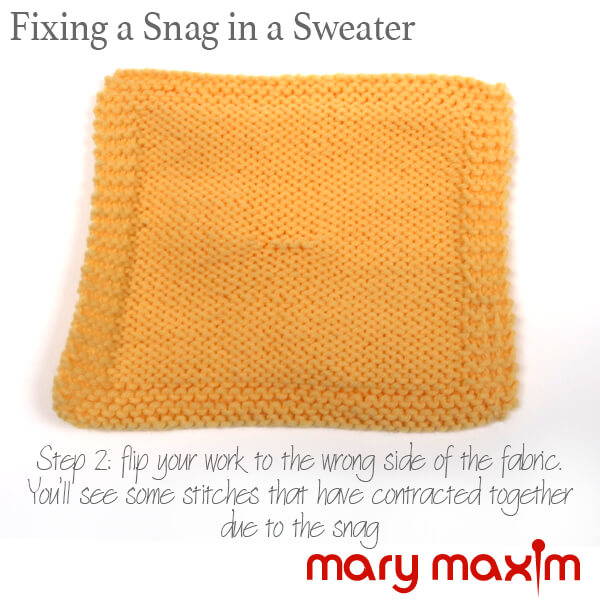
Flip the work to the wrong side. You'll often see stitches that have contracted together. Continue manipulating them back toward their original position.
Tip: Think of redistributing tension like smoothing out a wrinkle in a bed sheet — gentle, consistent movement from multiple directions works better than one hard pull.
Step 3: Even Out with a Crochet Hook
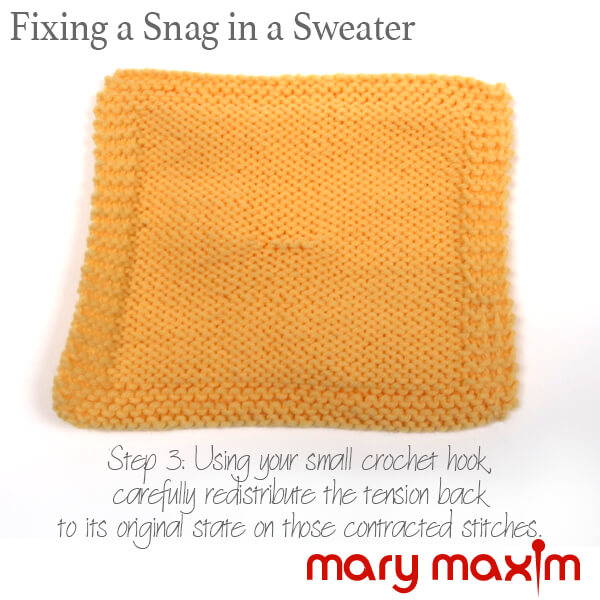
Use your small crochet hook to help pull the excess yarn through the adjacent stitches, spreading the tension evenly across the fabric. Work slowly — this step may take a few minutes, but it's worth the patience.
Step 4: Finish and Secure
Keep working until the item looks as it did before the damage. If there's still some slack in the stitch after redistributing, tack it down on the wrong side using a hand-sewing needle and a matching thread colour. Before securing it permanently, check the tension on the right side to make sure everything looks even.
Tip: Always view the right side under good lighting before finishing. Small tension irregularities are much easier to spot — and fix — before you've sewn anything down.
Part 2: Repairing a Broken Yarn Snag
When the snag has caused the yarn to fray or snap, the repair requires a bit more care. You'll still follow the same general steps, but you'll need to pay special attention to the yarn ends.
Step 1: Bring Both Ends to the Wrong Side
Using a small crochet hook, gently pull both broken ends of yarn through to the wrong side of the fabric, keeping them in their natural stitch positions. If you're unsure of the correct path, study how the yarn moves through stitches in an undamaged area nearby for reference.
Step 2: Redistribute Tension and Secure the Ends
Pinch the broken yarn ends to keep them in place, then gently tug the surrounding stitches to redistribute the tension — just as you did in Part 1. Work the stitches back to their original appearance.
Once the tension is even, weave each yarn end securely into the wrong side of the fabric using a darning needle. Weave in at least 2–3 cm in multiple directions to prevent unravelling. Trim any excess, leaving a small tail.
Tip: For extra security on a broken yarn repair, use a matching thread colour to tack the repaired area on the wrong side before weaving in the ends. This helps maintain the stitch structure long-term.
Quick Reference Summary
|
Situation |
Action |
|
Yarn pulled but intact |
Locate snag → redistribute tension with yarn needle → even out with crochet hook → tack down if needed |
|
Yarn broken or frayed |
Pull ends to wrong side → redistribute tension → weave in ends securely |
|
Garment looks distorted |
Work from multiple directions; flip to wrong side to see contracted stitches |
|
Still loose after repair |
Tack down on wrong side with matching thread before finishing |
